
I have never made a wreath before, so this project is definitely for beginners. During this pandemic there have actually been a lot of home sales in Illinois, so this project will be gifted to someone I know who purchased a new home this month.
All products used were purchased online at Michaels and I drove up to the curb and they dropped it into my car through the backseat window. I have a lot of acrylic paints and brushes and I also had a hot glue gun. The paint, brush, glue gun, and glue can also be purchased at Michaels, Dollar Tree, Target, etc.

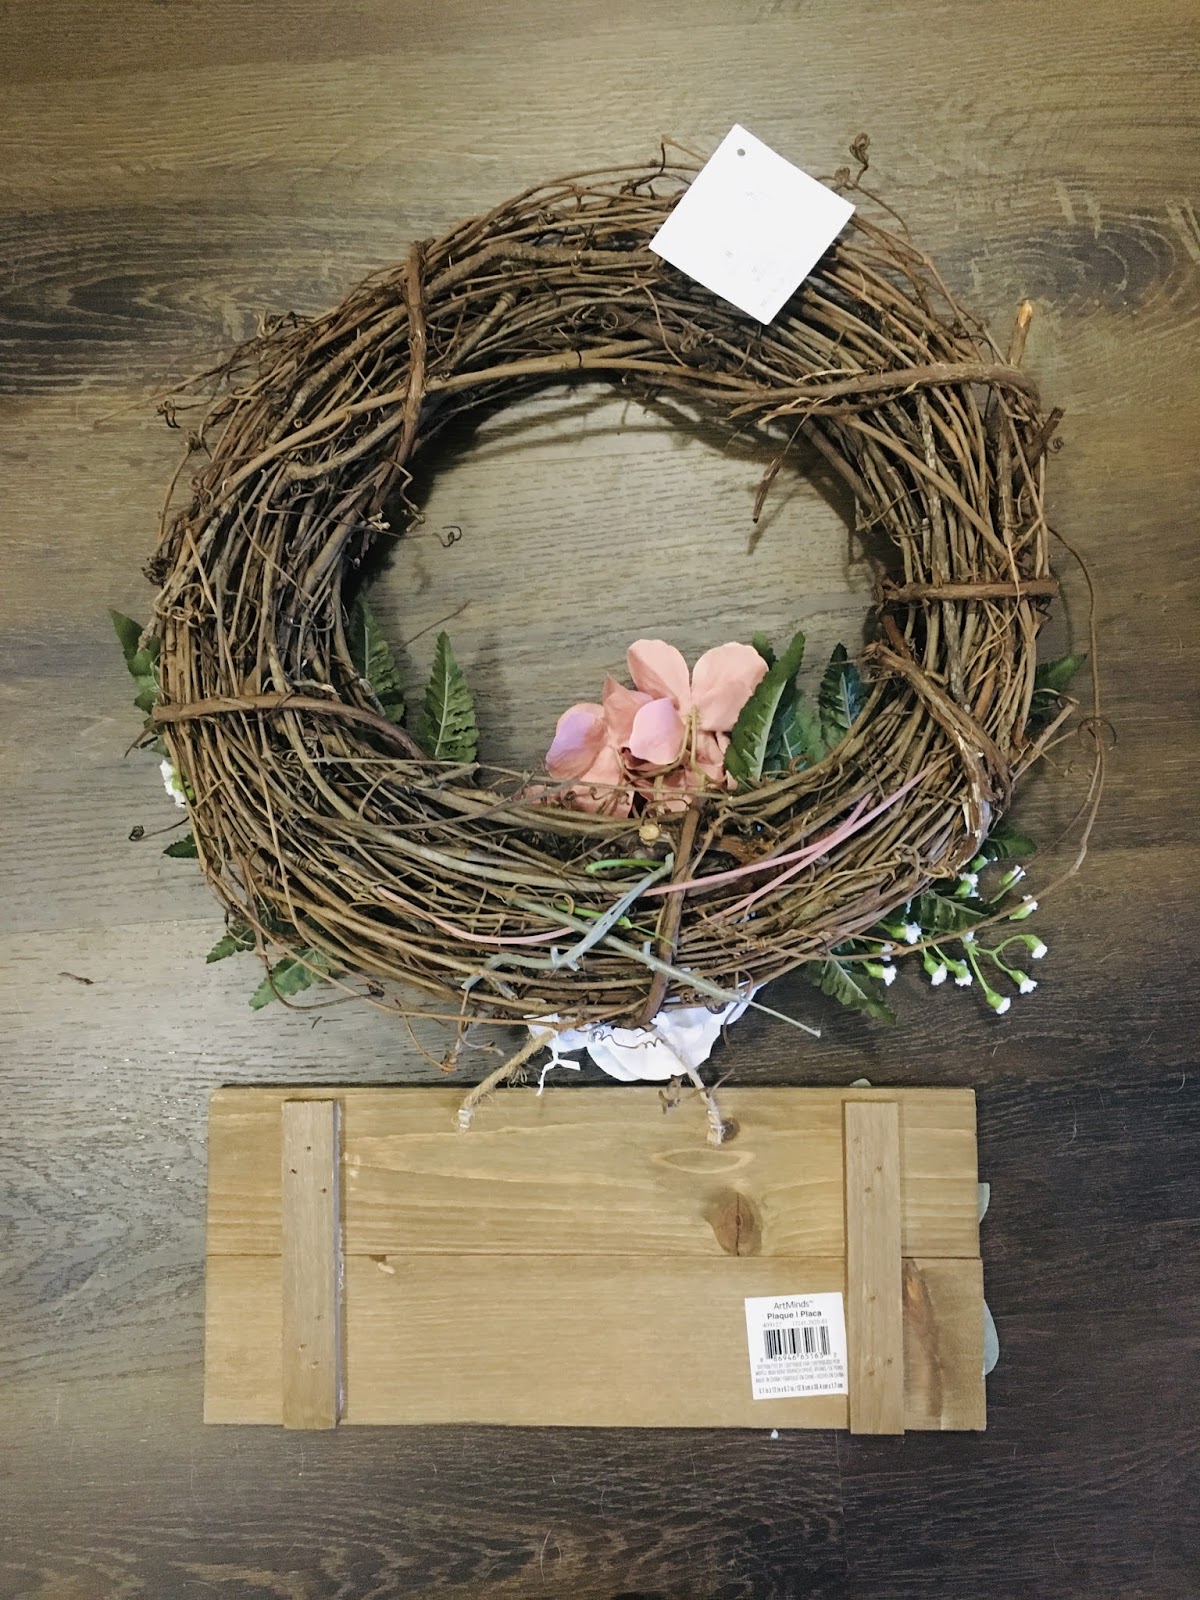
14’ Grapevine Wreath by Ashland in Natural Brown
$4.29 from Michaels
Leather Fern Spray by Ashland
4 Purchased: $1.53 from Michaels
Pink Hydrangea & Peony Stem Bundle by Ashland
$8.59 from Michaels
Rectangle Wood Pallet Plaque by ArtMinds
$2.57 from Michaels
Ivory Mini Gypsophila Spray by Ashland in White
2 Purchased: $2.29
I pulled apart the floral bundle to reveal each floral stem. I immediately was concerned after seeing how thick the stems were and worried they would not weave very well in-between the wreath branches. Well guess what, it was trickery! The stem is actually a hollow plastic stem with the wooden stem inside. It was very easy to pull the green plastic cover down to reveal the wood floral stem. There was one floral stem that was hard to pull down and I realized it was glued to the bottom of the flower leaf. I did not want to break the floral top so I used scissors to cut away the green plastic and left the top trim about 1 inch. These stems were very delicate so make sure you are gentle with them when using this kind of stripping method.


The ferns and gypsophila stems were too long so I used scissors to trim the length down to the same size as the hydrangea and peony stems. The fern also was too big and had too many leaves, so I trimmed four leaves starting from the bottom so more of the stem was visible and this would make it much easier to weave the stem through the branches. I found the actual weaving technique had no specific method when inserting the stems into the thick branches of the wreath. It was just a matter of maneuvering the stems using pressure and force to weave in-between the branches of the wreath.
After each stem was inserted and weaved as much as possible to be in my desired position, I then turned over the wreath to find the stem sticking up, and I pushed it through using downward force to weave it through the branches again. This allowed the stem to be nestled into the wreath securely.


I used white acrylic paint and a small brush to start to write ‘Welcome’ on the wood pallet plaque. I ended up with the word too far on the right side of the plaque and it looked very odd with a large space which was now on the left of the plaque. To cover this mistake, I plucked out a petal from the extra floral stem I had, and a silk leaf from the bundle and then I used hot glue from my glue gun to stick them in the extra space I had accidentally created. I would really recommend that you use chalk first to outline the words before you start using the paint! I then used two twisty-ties that I had in the kitchen from bread bags to tie the string of the of plaque to a think branch at the bottom center of the wreath. Michaels also has floral wire which is ideal for this project, but I did not want to purchase a large roll of floral wire just for this project.

When I first started weaving the stems in the wreath, I wanted to have the flowers and fern on the left of the wreath, but when I assembled it together I wasn’t loving how it looked with the wood pallet plaque in the center as it was too large. Instead, I assembled it with the flowers and fern in the lower center of the wreath and then the idea came to me to have the wood pallet plaque hang from underneath. In hindsight, I think a larger wreath would have suited this size plaque, such as an 18” wreath. You can also hang the plaque’s string from the top of the wreath using twisty-ties to a branch at the top. This way your plaque hangs in the center.

If you made this project please share it with us, we'd love to see it!
No comments:
Post a Comment