I want to start by saying I’m not a fan of crafts that waste food. I get irate, especially when I see crafts that involve wasting rice, like using rice in stress balls. In the past, rice was used to pay taxes, so to waste it is literally like wasting money and not to mention all the starving people in the world including here in the USA. That being said, I do use flour in this craft which is wasting food since you can use flour to make bread and other baked goods. But, here’s the thing, when the Covid-19 restrictions were in full swing a lot of things were out of stock in the grocery stores and online including flour.
I usually use unbleached all-purpose flour for my baking, and my favorite brand is King Arthur Flour (not sponsored, fyi) it is a wonderfully soft and silky and beautiful flour that makes extraordinary food when you bake with it. And, it was impossible to find for weeks, so I ended up with my least favorite flour as my only option, that being bleached all-purpose flour. I hate this type of flour but it was all I could find. It’s hard to explain how bad it is, the texture, it’s clumpy and dry and the way it bakes; everything about it is awful (just my opinion). The process of making it is awful as well, you strip away everything good about the flour then bleach it to make it white then “enrich” it by adding vitamins back into it. And just the idea that flour needs to be “bleached” is offensive to me. But I ended up with tons of it leftover when my good flour came back into stock so rather than waste the bleached flour I used it to make ornaments for Easter and I thought it would be fun to make more ornaments and candle holders with a Fall/Autumn theme.
Step 1: Gather Ingredients and Materials and Making the Dough

For this craft I used Salt Dough. There are lots of recipes for it online. It's two parts flour, one part salt, about one part water, and a little oil to bring it together. Some recipes don’t use oil but I think a tablespoon or two helps make the dough easy to shape. I like thinking of this recipe in “parts” rather than cups because you can adjust it if you want to make a lot or a little. But if you need help then you can do it this way: 2 cups flour, 1 cup salt, 1-ish cups water, one or two tablespoons of vegetable oil.
The reason why the oil and water are not exact is because it will depend on the type of flour you use, so start with one tablespoon of oil and maybe ¾ cup of water and see if your dough is coming together, and if it’s not smooth at more water and oil until it looks a little like clay or playdough. (I want to credit Sherri Osborne for the recipe I used)
Step 2: Rolling and Cutting Shapes

If you have Fall/Autumn themed cookie cutters then the next part is easy, just roll out the dough to about ¾ of an inch and cut it out. I don’t have those kinds of cookie cutters so I made a template with some cardboard and used that to cut it out with a butter knife.

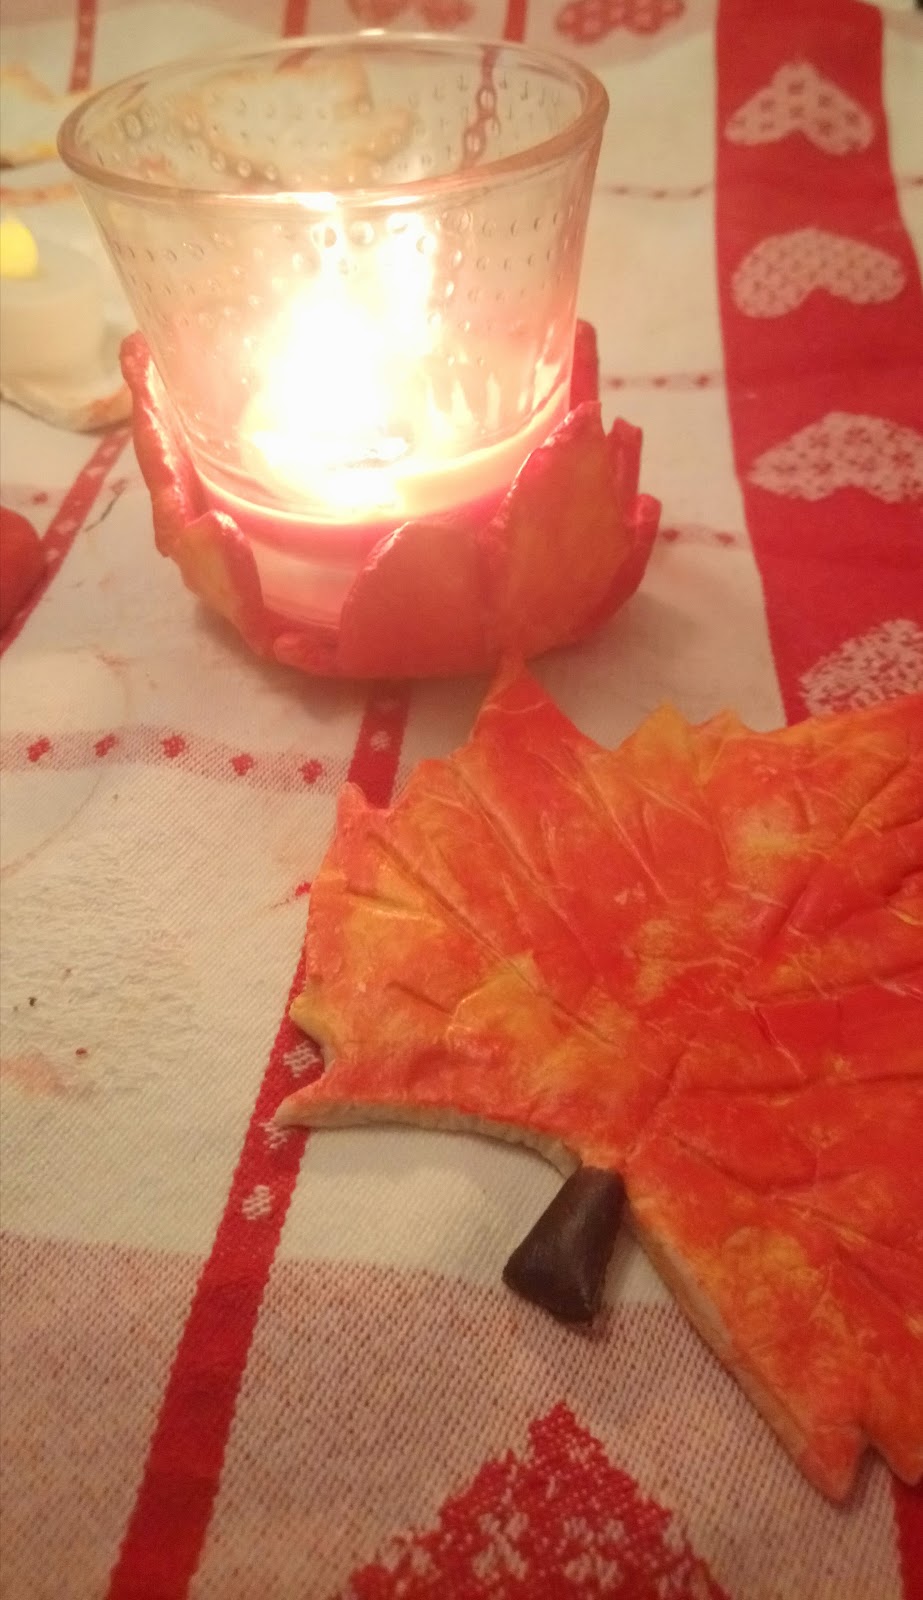
Then you can add whatever lines or details you want on your shapes. I did some veins on these leaves with the back of a butter knife. You could also use real leaves to make an indent on the dough.
For the candle holders I tried a few different styles. One I put into a ramekin to create a cradled shape, one I took small dough leaves and folded them over a ramekin to create a cup shape, one I put over a ball of foil to make an indent for the candle. For the one I did with the foil, you should make sure the bottom is flat by putting another ramekin on top or something flat and oven safe because I did not do that and my candle holder didn’t have a flat surface on the bottom when I flipped it over. I also made a few pumpkins and other leaves just for fun.


Step 3: Bake the dough
The next step once you have all your shapes is to bake them. You can also let them air dry but it will take several days if not weeks and I find that baking them makes them a bit more sturdy than air drying. I baked mine at 250F for an hour and then removed the one in the ramekin so it could bake fully. It took another hour for them to be a bit more dried out and then I lowered the temperature to 200 degrees and baked a while longer and left them in the oven with it off overnight. The baking time will depend on how thick your decorations are so you just have to keep checking. They should not ever brown like a baked good, if they start to brown your oven is too high and you should reduce the temperature. When they no longer look “raw” then let them cool. They should be hard and not pliable or soft to the touch.

Step 4: Decorating
Once they dry and are totally cool you can paint them. But you want to sand down any rough edges first. You can use sandpaper or a nail file.

Even though the flour is bleached if you want a white ornament I suggest painting it white, you can see below the difference in color when you paint it verus the color of the baked dough. I know for Farmhouse style white is really popular; that’s why I did a few white, but I need some color, I can’t do all white.


I use acrylic paint and sealed it with Mod Podge for shine and to protect the color. I suggest letting the paint dry for several hours to overnight before adding more coats. These salt dough ornaments can resist painting and if you try to paint more than one coat before it’s totally dry your second coat can make the first coat peel and the same is true with Mod Podge. Make sure your paint is totally dry before you put the Mod Podge coat on. You could probably also use a spray sealer but I haven’t tried that.

Once the Mod Podge is set you can display your decor. I recommend only using electric candles! I used a real one here just for demo, if I were going to use this for decorating I would get a large electric candle but I only have the tea light size which is too small for the holders. Also, I wouldn’t put anything too heavy in them because they are study but not unbreakable. You can use the smaller decorations as refrigerator magnets by adding a strong magnet to the back or you can add them to a Fall/Autumn wreath.


I know this seems like a kids craft and it can be, but I think adults can enjoy it also. I really enjoyed painting the leaves and pumpkins. I think these would make nice gifts for someone or you could make several of the same style like the white ones I made and use them as a centerpiece for your table. Once they’re painted and sealed they look a lot like some of the clay items you might see at a store but at a fraction of the cost. You could easily get everything you need for this for under $5. And if you wanted to you could use gold or metallic paint to give it a high end look.


